Printable template
Science Investigation Poster
Sectioned blank presentation sheet.
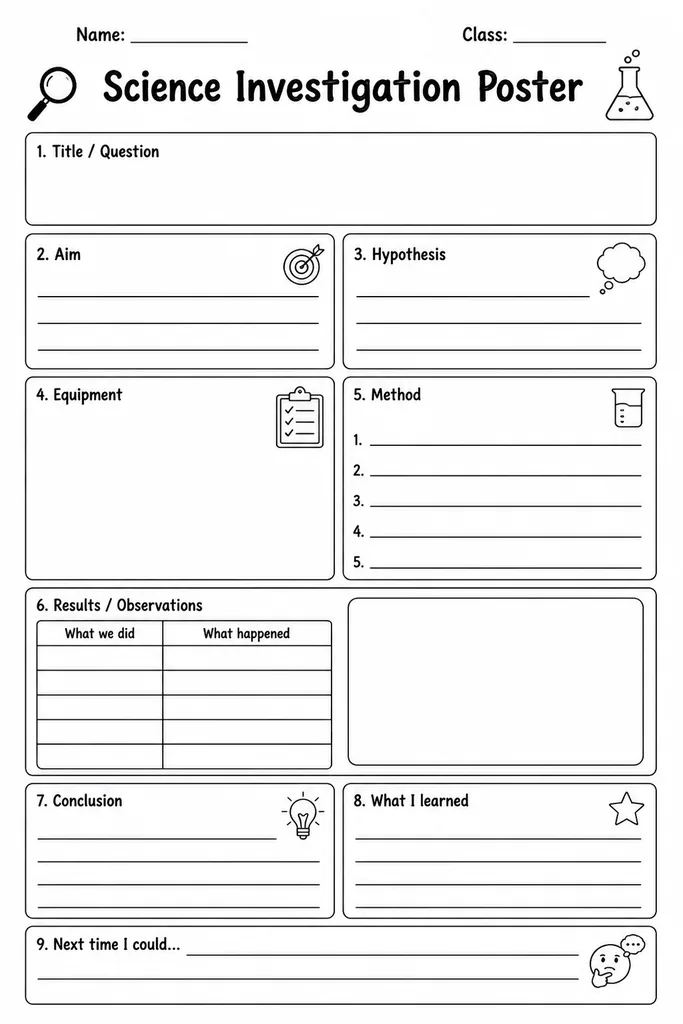
The Science Investigation Poster is a large-format, sectioned blank sheet that guides students through communicating a complete inquiry or experiment in one visually organised display. Divided into labelled zones — question, hypothesis, materials, procedure, results, and conclusion — it works as a science fair board substitute, a classroom display, or a structured written report on a single page. Students in grades 3–8 use it whenever they complete a hands-on investigation and need to present findings clearly to an audience. Teachers distribute it before lab work so students know what they are expected to record; the visual boundary of each section prevents over-writing in one area at the expense of another. Parents homeschooling or running kitchen-science experiments find it equally useful because it gives young investigators a professional framework for even informal observations.
Learning objectives
- Communicate experimental findings in a structured, audience-friendly format
- Practise organising the steps of the scientific method in sequence
- Distinguish between data (results) and interpretation (conclusion)
- Present visual evidence such as graphs, diagrams, or data tables within the results section
- Develop scientific writing and visual communication skills
- Prepare for science fair or classroom poster presentations
How to use this template
- Print the template on A3/tabloid paper for a full poster, or scale it to letter size for a compact report sheet.
- Write the investigation question in the top question box before starting any experiment.
- Fill in the hypothesis, materials list, and step-by-step procedure sections before conducting the experiment.
- Record raw data, measurements, or observational sketches in the results section during or immediately after the experiment.
- Complete the conclusion section after reviewing results, linking findings back to the original hypothesis.
Classroom & home ideas
- Science fair prep: students use the poster as a planning draft before transferring content to a tri-fold display board.
- Whole-class demo: teacher conducts an experiment live; students fill in each section in real time as a guided note-taking activity.
- Partner investigations: each pair conducts a different variable test (e.g. paper aeroplane wing shape); finished posters are displayed for a gallery walk comparison.
- Grades 3–4 scaffolded entry: teacher pre-fills the procedure section; younger students only need to record results and draw a conclusion.
- Digital display: students photograph completed posters and submit them as e-portfolio entries for remote or hybrid science units.
Skills practised
Frequently asked questions
How many sections are on the Science Investigation Poster template?
The template includes six clearly labelled sections: Question, Hypothesis, Materials, Procedure, Results (with a blank graph/data area), and Conclusion — covering the full scientific method cycle.
Can younger students in grade 3 complete this independently?
With teacher guidance, yes — the pre-labelled sections act as prompts. Many teachers pre-fill the Materials and Procedure boxes for grades 3–4 and ask students to focus on recording results and writing their own conclusion.
Is the template large enough to use as an actual science fair poster?
Printed on A3 or tabloid paper it works well as a single-sheet poster for classroom fairs. For a tri-fold board at a regional fair, students typically use it as a planning guide and then scale content up.
Can students include photos or printed graphs in the results section?
Absolutely — the results section is a blank box students can draw in, paste photos onto, or tape in a printed graph, making the template flexible for both analogue and mixed-media presentations.
Likes & comments
See what other teachers think and share a helpful note.
Create more worksheets in our Worksheet Studio
Generate fresh worksheets for any grade, topic, and language — free.
Open the Worksheet StudioRelated worksheets
Minibeast Hunt Recording Sheet
Weather Diary / Chart
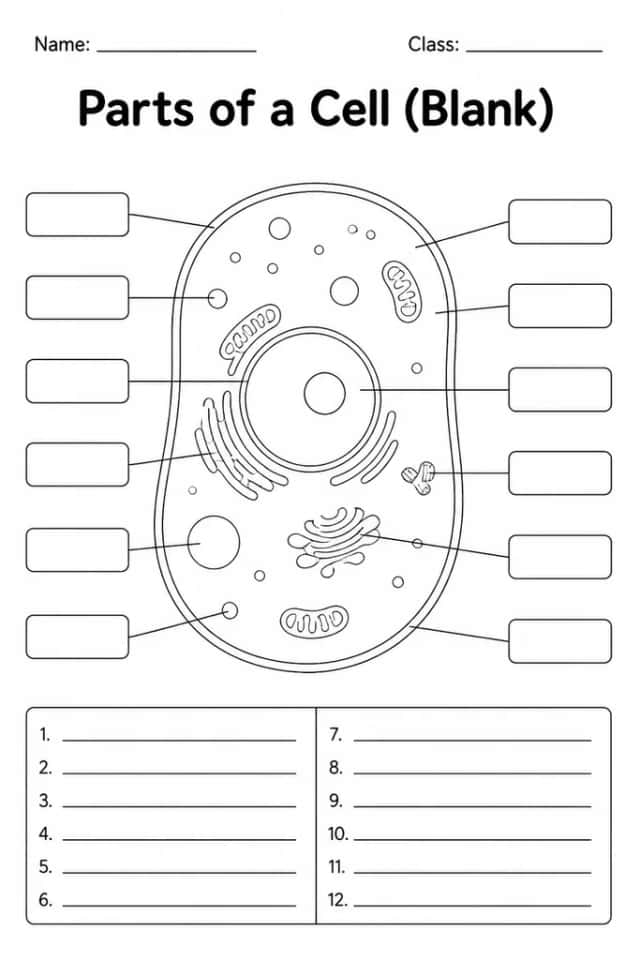
Parts of a Cell (Blank)
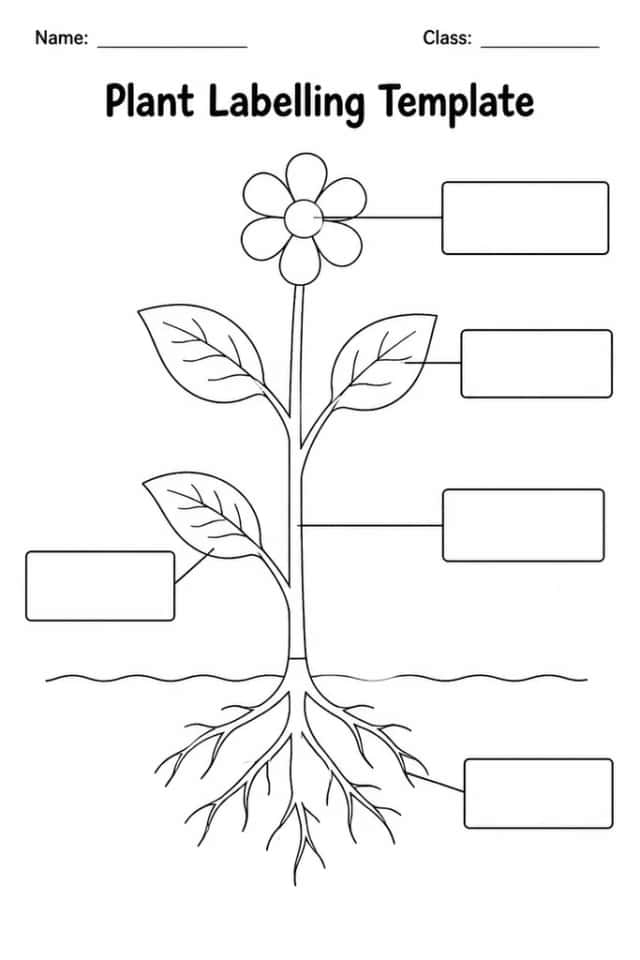
Plant Labelling Template
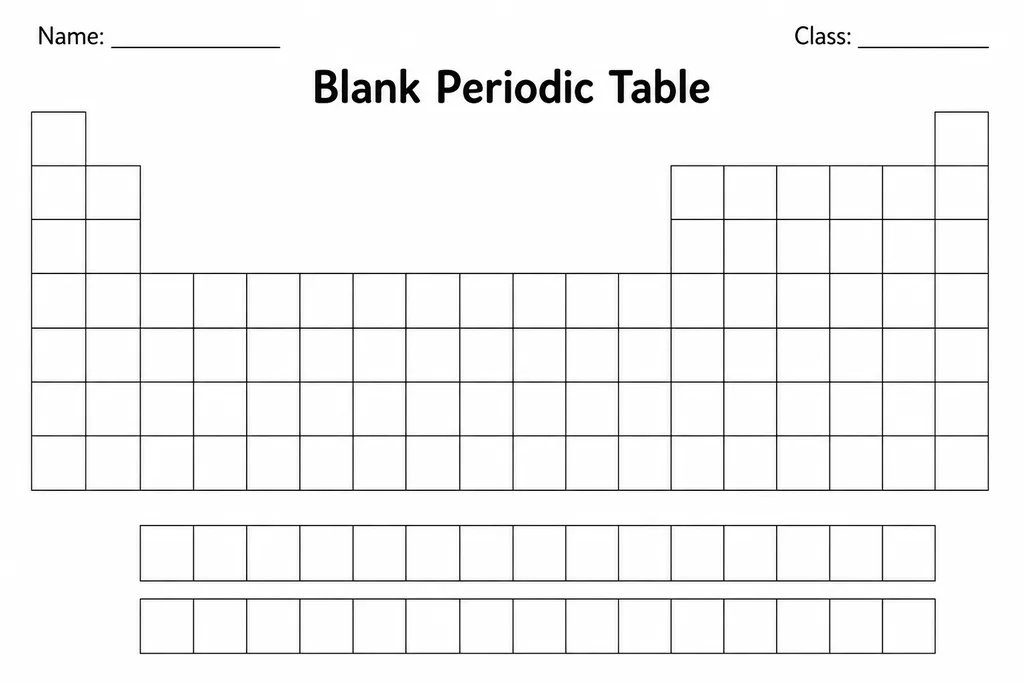
Blank Periodic Table
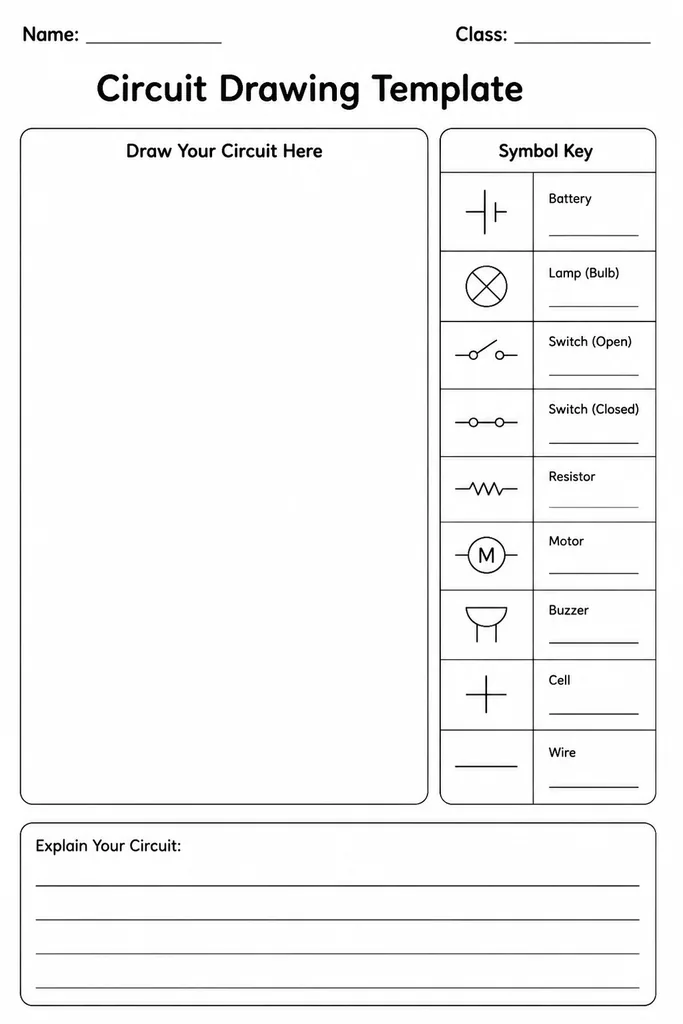
Circuit Drawing Template
Microscope Drawing Template